
Start your Business or Blog. Here is a step-by-step guide on how to create a website or blog with Bluehost.
This post is part 4 of my “Be your Own Boss” series.
Part 1: Business Ideas – Get inspired & choose.
Part 2: How to start a Business with Low Investment.
Part 3: wordpress.com vs wordpress.org – everything about choosing the right platform.
Part 4: How to create a website/blog. <<YOU ARE HERE>>
Part 5: How to choose & install a WordPress theme
Part 6: Essential settings after installing WordPress
Part 7: How to install a WordPress plugin
Part 8: Tried and tested ways to start Promotion of your blog / website
Part 9: How to Grow your Business online
How to Create a Website / Blog with Bluehost
Starting a website or blog can be one of the easiest or hardest things in the world, depending on where you are in your journey to starting your own online business.
Frankly, there are two ways to start your online business –
- Start with a professional team or agency. Hire experienced people individually or hire an agency who can set up everything for you. But this requires a lot of working capital. And because you are going to put in so much capital, you will need to test the viability of your business idea. No one wants to be stuck with a dud idea. Or . .
- Start as a small team. There are unlimited open source software available to implement any basic business idea. This method of-course is low risk. The capital requirement is minimal, however you will wear many hats as the business owner, as customer support, even as marketing manager, content creator & more.
I myself am a fan of the second method. Do note that saving on initial capital will mean more effort and time investment on your end. But this is still my favorite method. Its a great achievable challenge for the red-blooded!
I call this method the bootstrapping hustler method!
So I am going to hand hold you into creating your own blog or website with very little investment.
A new website has a very little bandwidth requirement. So you can save substantially by hosting your website with a reputed but economical shared hosting service.
Bluehost will host and keep your website content safe on their servers. It’s a powerful & economical hosting company for beginners, as it’s easier to set up than others.
It is important that when you’re starting out and not making any income from your blog yet, you want to pay as little as you can. And that is the reason why we will also choose self hosted WordPress as our content management system. This will keep our software bills to $0, with maximum control.
Create your own website – bring your business idea to life.
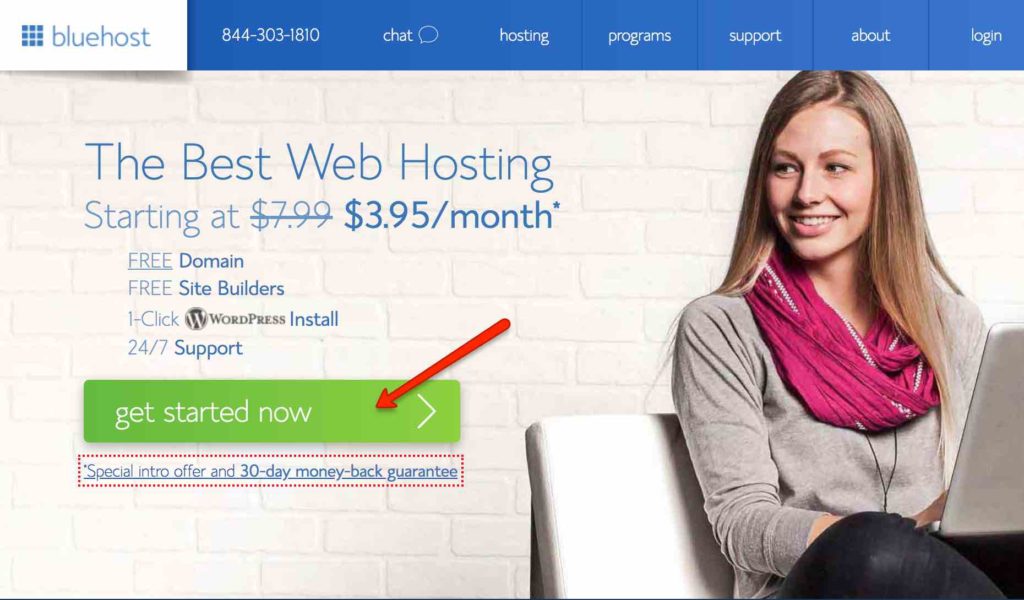
Step 1: Sign Up with Bluehost
Go to the Bluehost website from here for a 50% discount.
The above link will give you an exclusive 50% discount on bluehost hosting services, depending on the term plan you choose. After you have clicked on the link above, you will see the following screen :
Step 2: Choose a hosting plan
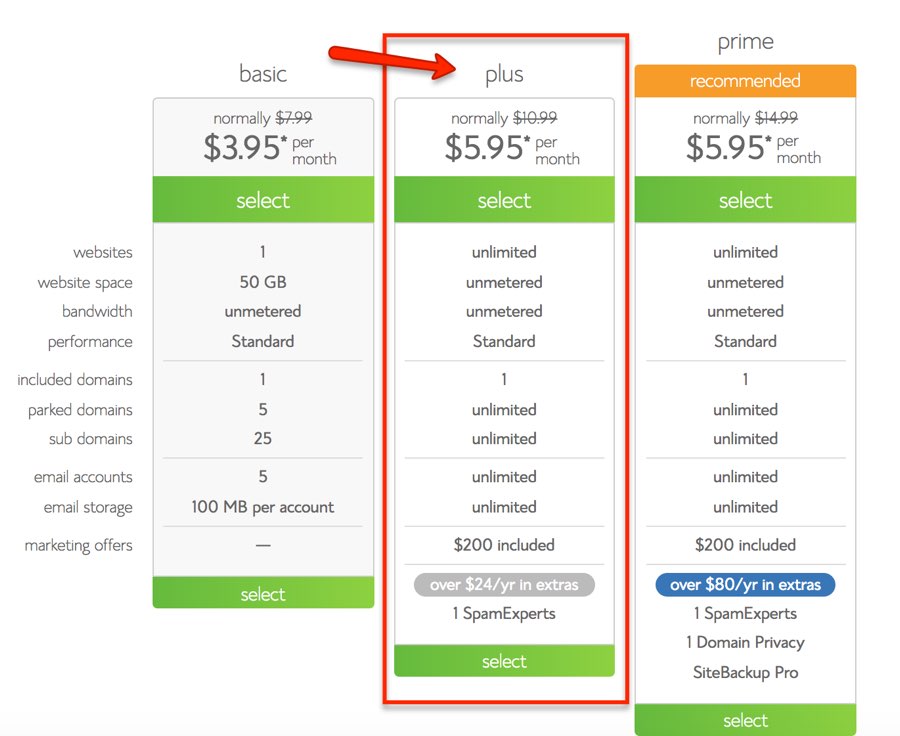
The basic plan though the cheapest is very limited. It allows only 1 website & 1 domain. It also allows only 5 email account with only 100MB storage per account.
I recommend that you go with the PLUS plan that will cover all your requirements.
If you’re still struggling to decide if Bluehost is right for you, I suggest to just go for it.
You see it’s very important that a web host meet certain technical requirements. Bluehost perfectly meets these requirements. It can handle any low-medium traffic site with ease. Bluehost hosting comes with a free domain, free SSL certification, 1-click wordpress install, 24/7 support and even a 30 day money back guarantee.
So Just click here and claim your bluehost discount for your first website hosting
Step 3: Register Your free Domain
Register your free domain with bluehost or enter your domain if you have already have one.

All bluehost plans include a free domain, so you do not need to pay for one. A .com domain costs anywhere between $12 to $15/ per year. Bluehost offers you your choice of domain absolutely free for a year.
Remember that once a domain is bought it cannot be changed to brainstorm a little and give your domain name some though before registering it. Think of at least 3 or 4 domain names as your preferred domain name may not be available.
Yep you cant name your site google.com, as Google corporation has already registered that. You know what I mean.
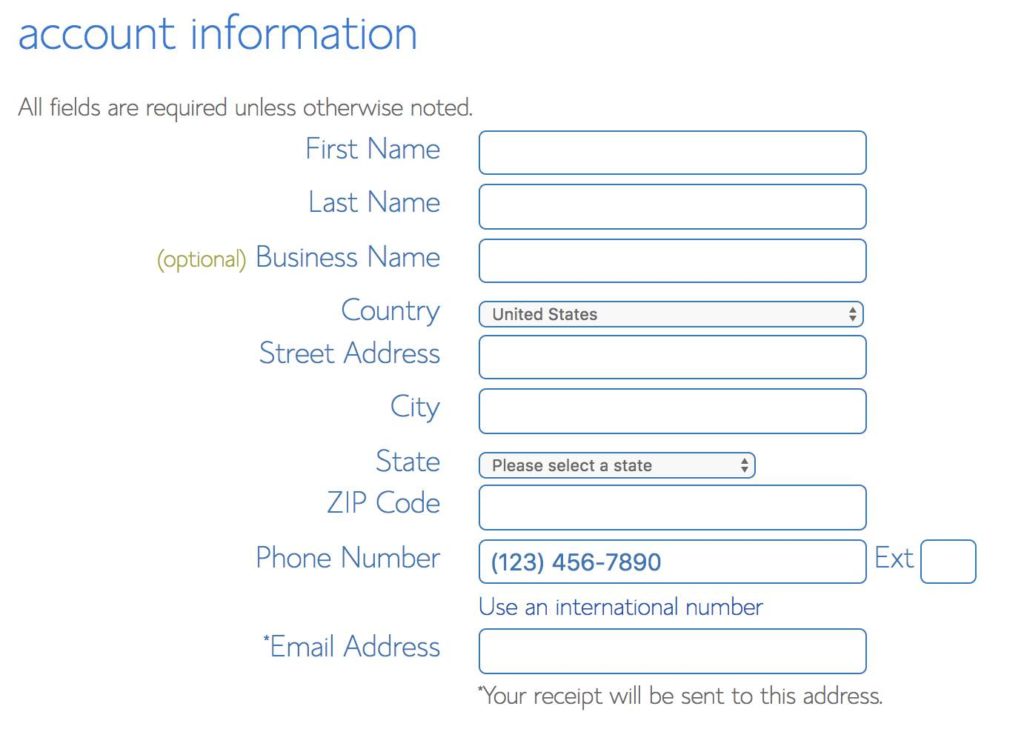
Step 4: Create your account
Step 5: Select your hosting term plan or hosting duration
Bluehost offers 3 shared hosting package, and all packages come with one free domain name + Free SSL Certificate & PHP 7.0 support.
Here are the packages:
- Bluehost Basic: Let you host 1 website
- Recommended – Bluehost Plus: Lets you host unlimited Websites ( Recommended plan)
- Bluehost Prime: Recommended for those who need who.is privacy for domain.
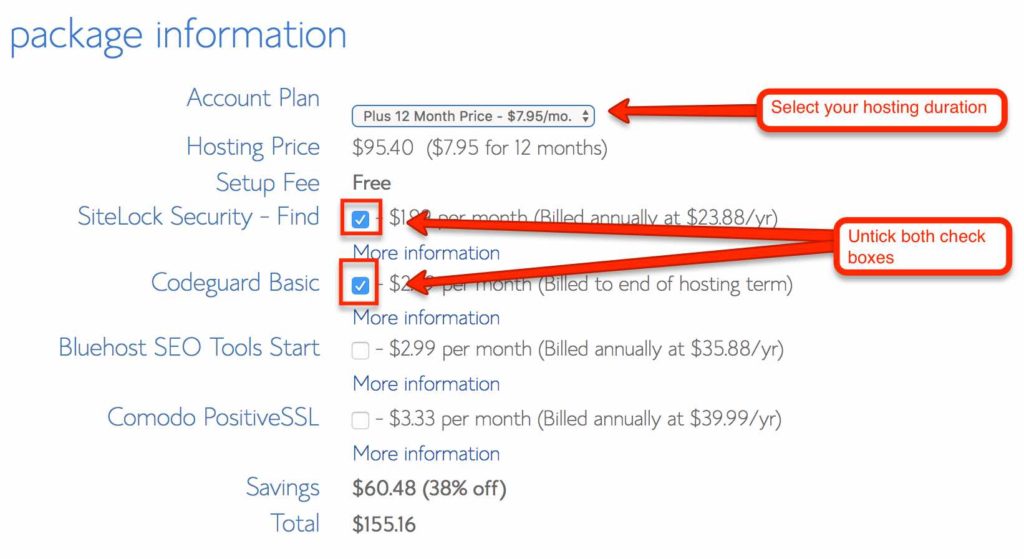
My recommendation is that you should go for Bluehost plus package for 2 or 3 years term. Higher the term plan will be, the more saving you will make.
With my Bluehost coupon, you will get the maximum possible discount on your first bill.
If you sign up for 3 years you get billed at $3.95/month for the basic package instead of the usual $7.99/month. And if you sign up for the PLUS package you will get billed for $5.95/month instead of the 10.99$/month.
This coupon gives you close to 50% discount on the total cost.
Remember, your only chance to save money on web hosting is on your first bill. there is no discount on hosting renewal.
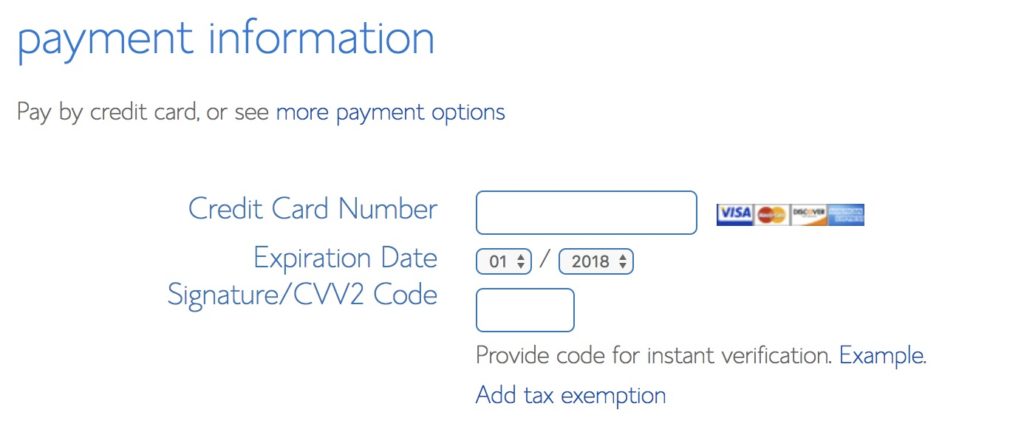
You can pay via Credit card or Paypal.
Step 6: Make the Payment
Enter your credit card details, tick the agreement to the terms & conditions and click submit.
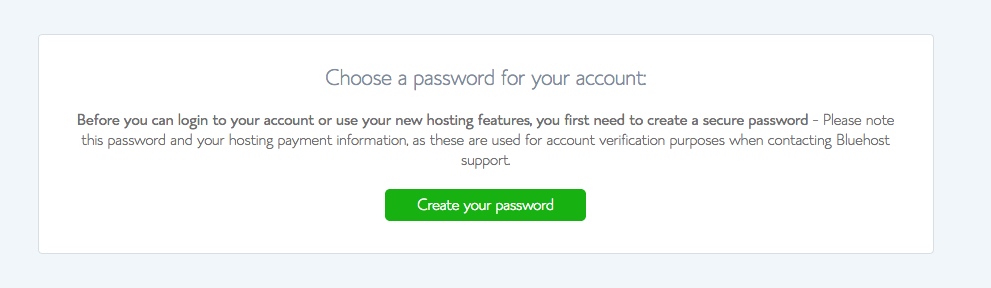
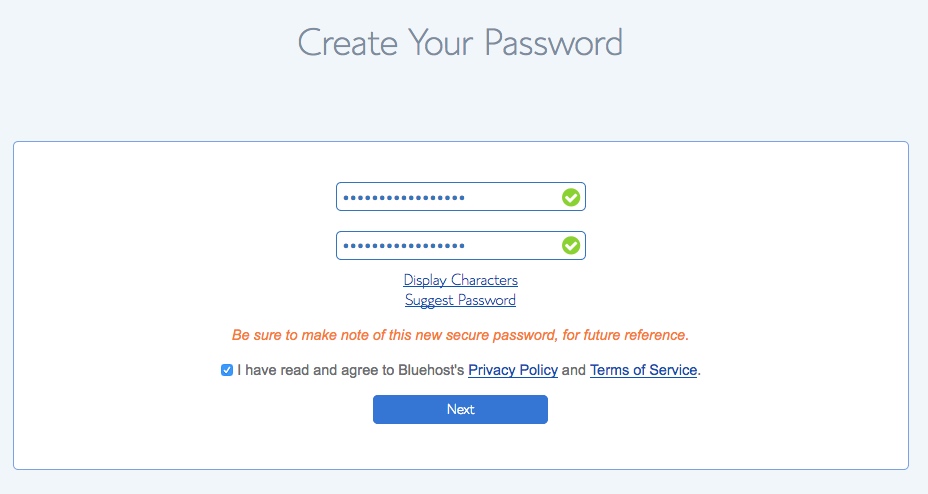
Step 7: Set your password.
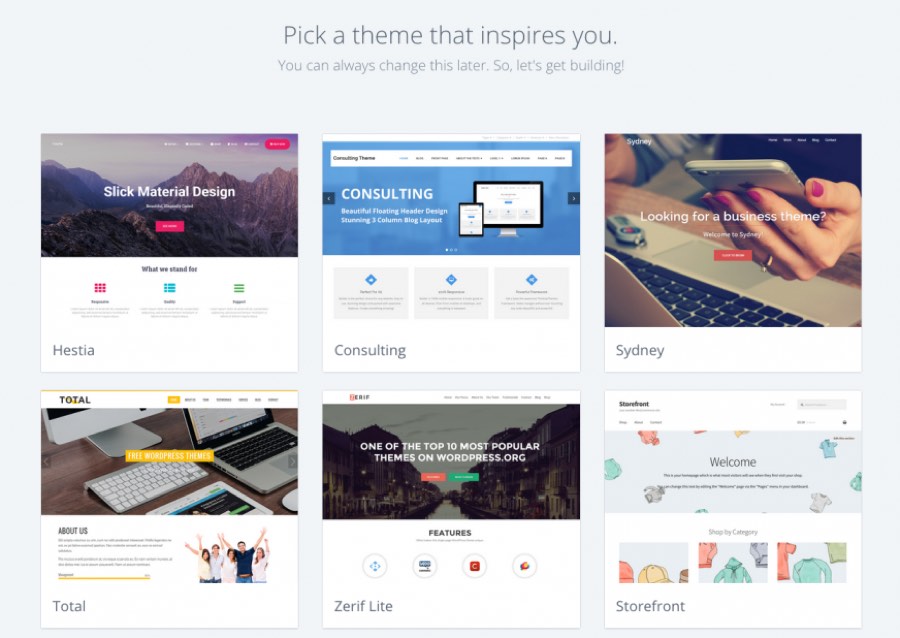
Step 8: Choose your wordpress theme
Unlike before when one had to first create an account with bluehost and then manually install wordpress, bluehost has now automated the entire process by creating its account sign up around wordpress.
If you have followed the above steps 1 to step 7 and purchased hosting + free domain name from Bluehost, it will start installing WordPress for you automatically.
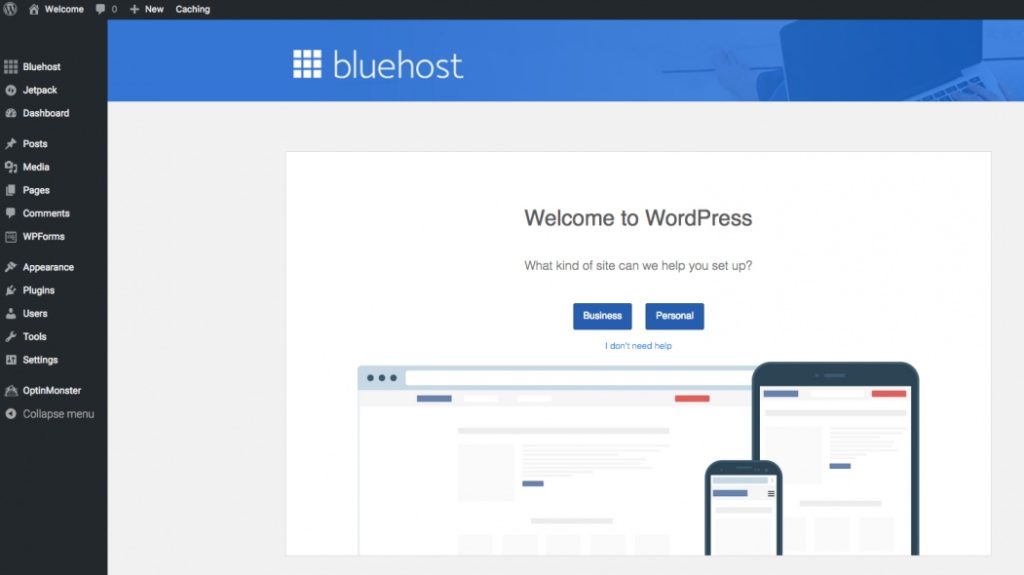
You will be shown free themes to install on wordpress. Yep they install wordpress by default!
From here you can choose to either:
- Start Building your website on WordPress right away (optional first step) OR
- Go to your Bluehost account Dashboard (cpanel)
If you choose to install a theme, it will log you on to your wordpress dashboard which will look like this.
Remember that this step is optional. You can choose to go to the bluehost dashboard first as well.
If you decide to login to the bluehost panel first, just skip choosing the theme above. Your bluehost dashboard will look like this in 2018
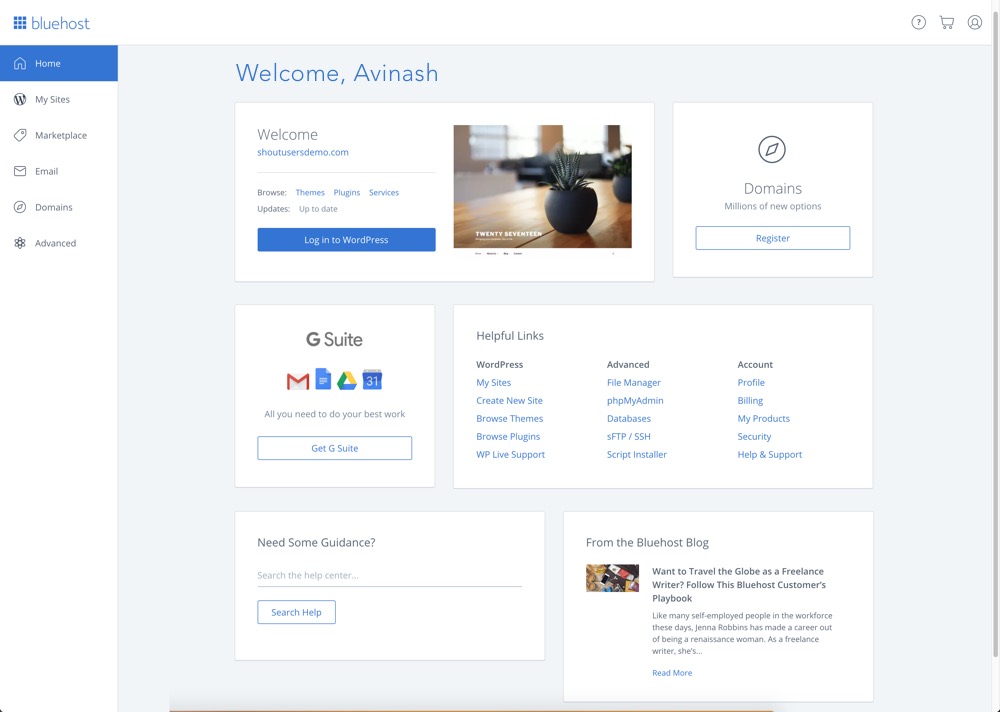
Just click on Login to WordPress to automatically login inside your WordPress Blog dashboard.
Installing WordPress Manually on Bluehost:
Now, for some reason you end up deleting your existing WordPress installation or maybe you want to install WordPress on a new domain (Addon domain), you can follow the steps shown below to do so.
Step 1: Login to your Bluehost Hosting Dashboard
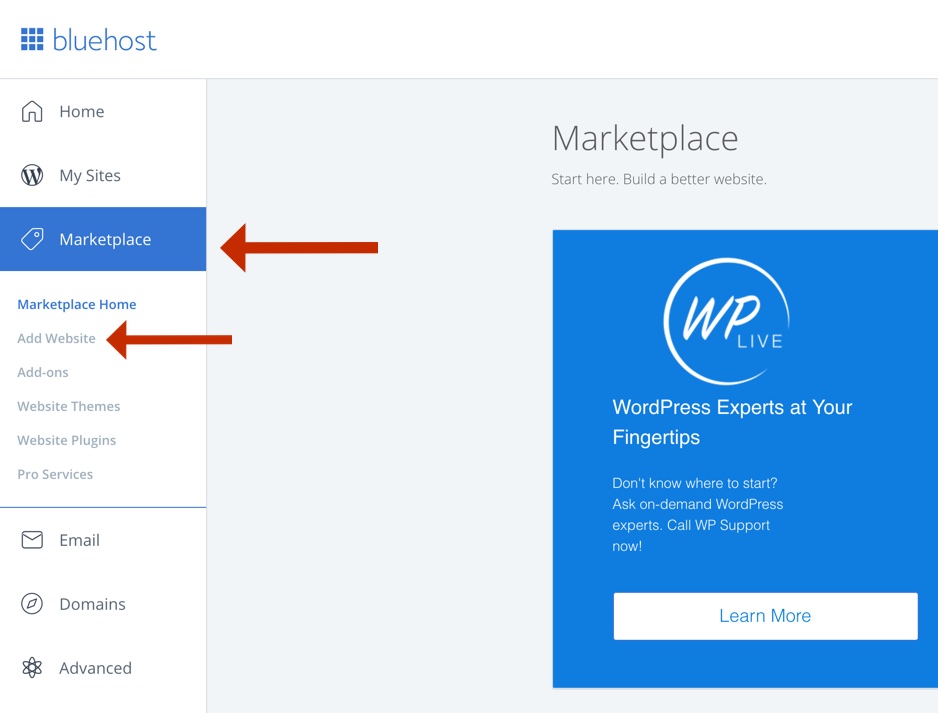
Step 2: Add New Website
Now click on “Marketplace” tab on the bluehost dashboard. Then click on “Add Website” and enter the required details, as shown in the image above.
Then choose your site name and site tagline as shown below.

Click on next and select the domain on which you want WordPress to be installed.
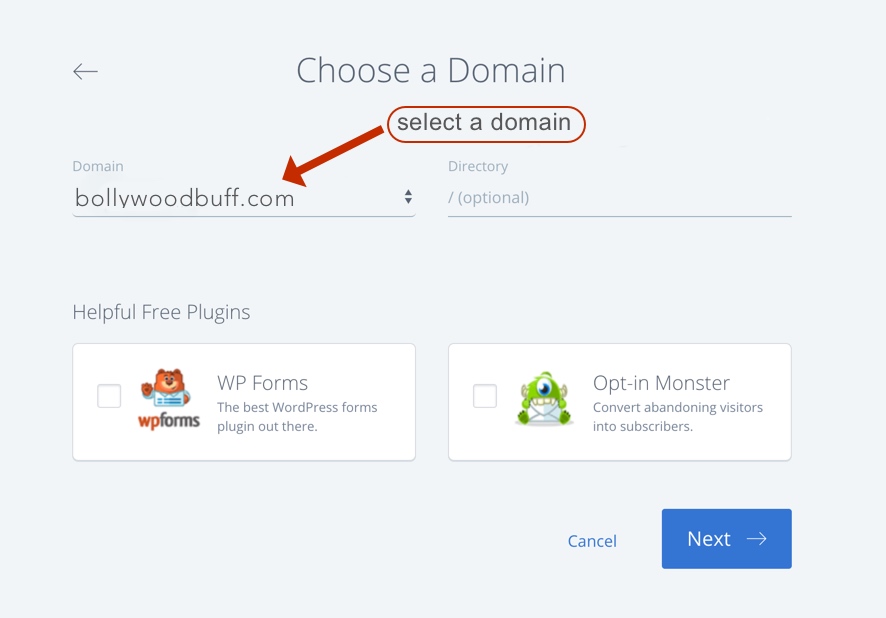
Click on next and WordPress will be installed on your selected domain within 5 minutes.
That’s it!
So go ahead and create your WordPress blog on Bluehost (includes a free domain name), if you have already not done so!
Have fun creating your own web application.